|
Leaderboard

.jpg.44da0172a400adb6811f03be15189781.thumb.jpg.4316d89cc7dd35bcdf11c619d81a9d25.jpg)

Popular Content
Showing content with the highest reputation on 03/21/17 in all areas
-
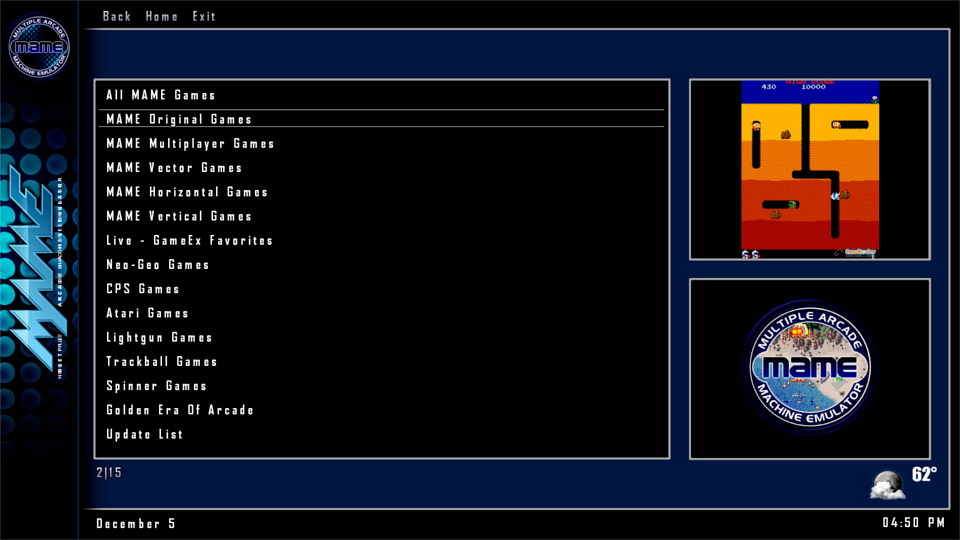
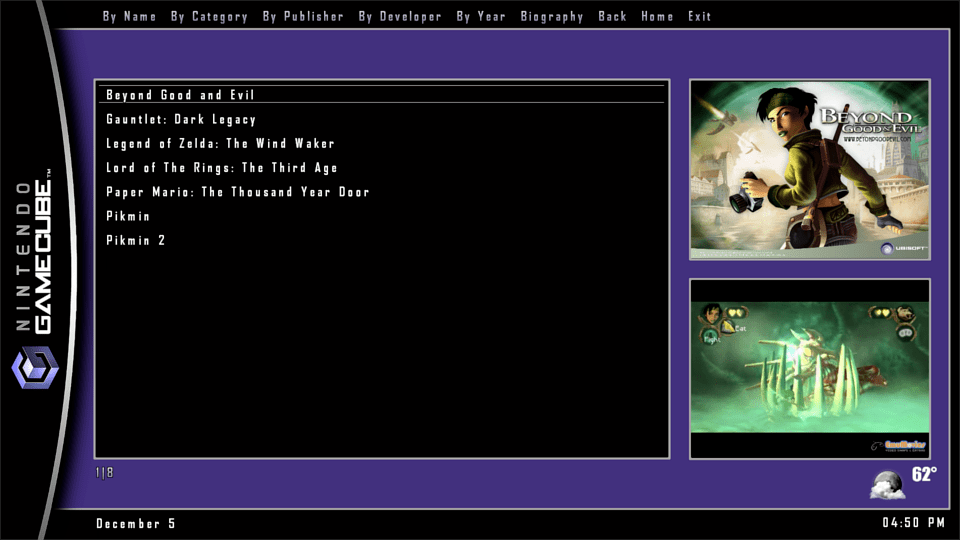
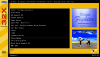
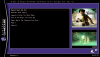
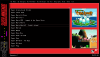
This is my first theme for GameEx (or for anything else for that matter). When I first started making the theme, I did not expect it to be anything special, but at some point I really thought it started looking pretty good. After all the positive feedback and great suggestions from everyone who took the time to take a look at my work, I am ready to release it. The idea of the Sidebar theme is to give the GameEx user the feeling of looking at the box or jewel case that games might come in. It is fairly simple and minimalistic, but when combined with title/snap shots or videos, it looks nice. Hopefully someone else out there there in GameEx-land will enjoy it as well. Most assets have been altered or changed including: - 45+ Backgrounds (including optional alternate backgrounds) - 90+ Logos to match the backgrounds or game consoles - Update and Loading screen assets - Sound assets Here are some snaps of the theme in action: RELEASE: http://www.gameex.info/forums/files/file/529-sidebar-1920x1080/ ...and a big thanks to everyone who took part in this thread over the last few weeks. === 7-20-2016 === - Added Wii logo and background
 1 point
 -
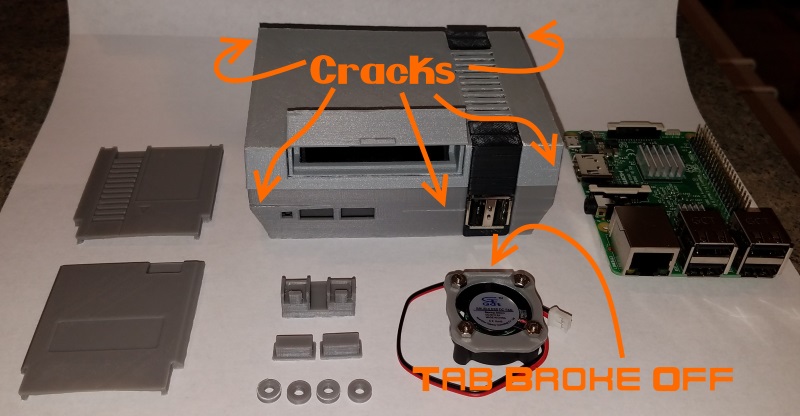
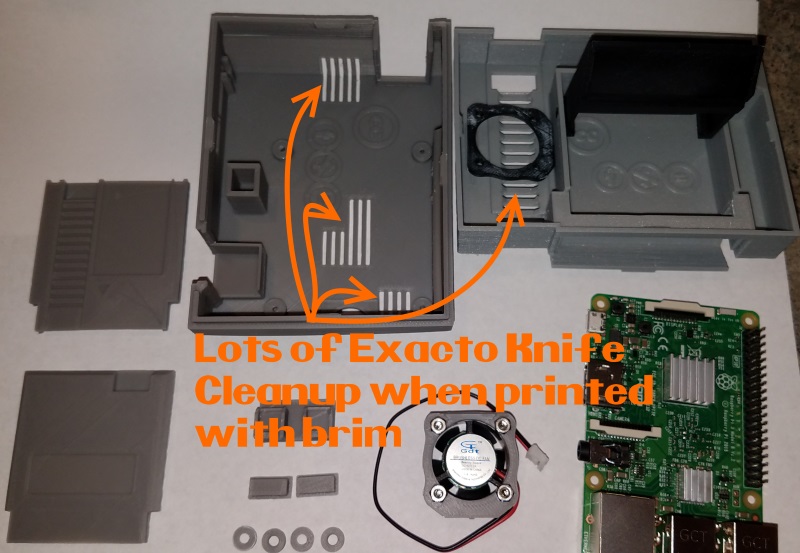
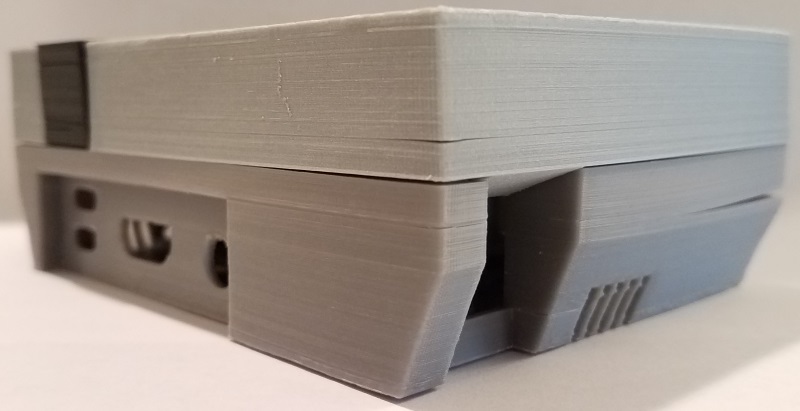
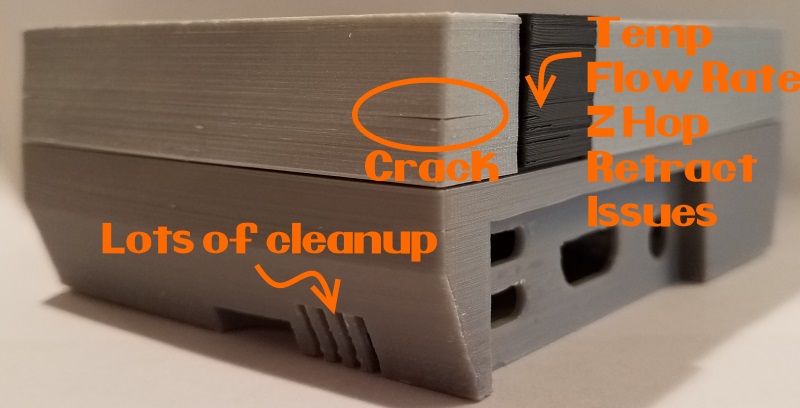
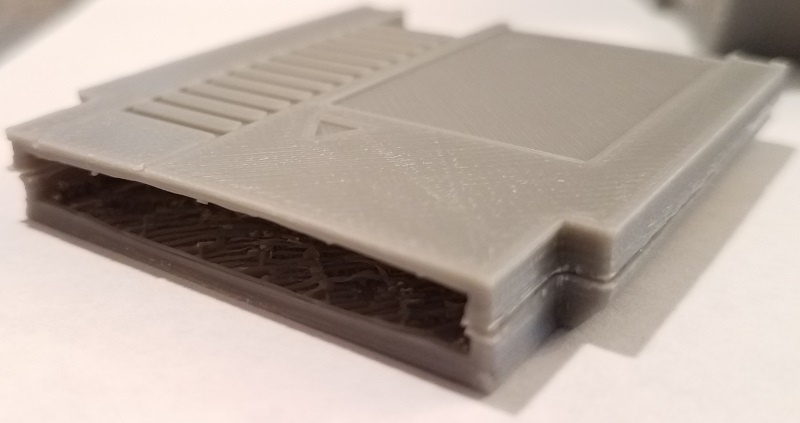
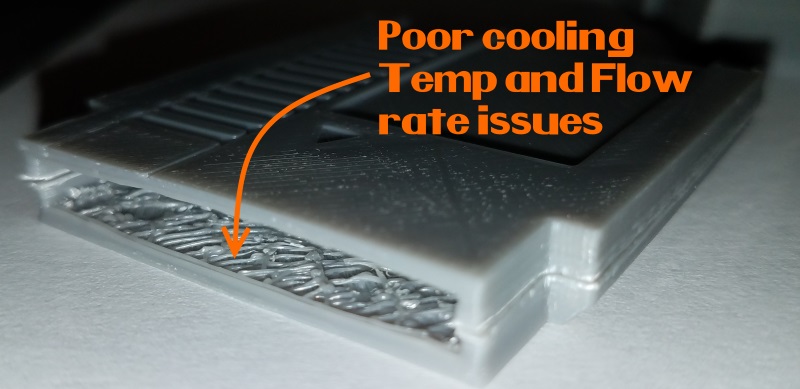
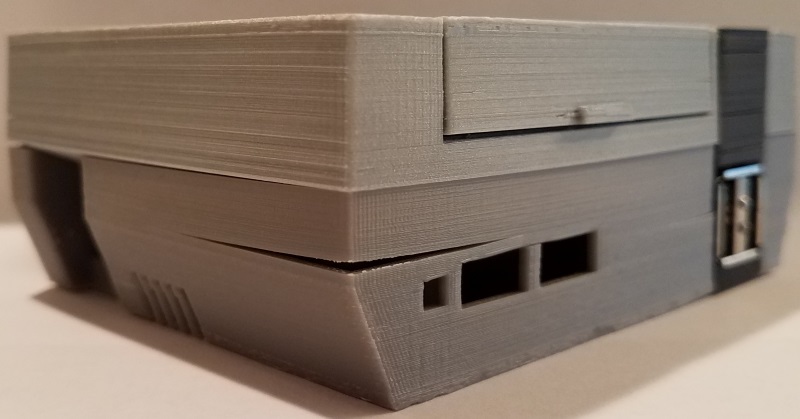
Part 1: The Seed of an Idea Ok, so I was inspired by @hansolo77's NintendoPi project. I wanted to get my hands on an official NES Classic and modify it to house a Pi3 rev. B, without loosing stock function. However that's impossible before the new year - or rather expensive due to the "Bot" buying and resale price gouge market before the winter holidays. Whatever, until I can actually get one to mod, I can always work on the Rasberry Pi, Retro Pi and maybe even print my own from daftmike's MiniNES:thingiverse files...Hmmm Project Cost to this point = $0, Just the time Planning, Researching Feasibility, Not playing Skyrim, etc. Part 2: 3D Printer "Wait a minuet," you're saying. "Aren't 3D printers Expensive? At least the good ones?" Well, yeah they kinda are. Certainly a commercial model will be out of reach of the casual consumer, but there is a strong open source collaborative approach to 3D printing. As a result the precarious precipice of price exclusivity has transitioned more to a slope of cost versus cons. You no longer need to mortgage your house to afford one. There are a range of printer designs that have produced more affordable solutions. It's give and take, but if your willing to tinker and learn some tricks price is no longer prohibitive. Neither do you need to be a genius. The software required has automated the process of "slicing" the 3D models and converting it to a tool path (Gcode) for you. If you can use Sketchup (my preference) or any other 3D modeling program, you can easily create a tool path your 3D printer can understand, There are very good slicer programs available for free and room fo grow into paid software if needed. Now, Ive been wanting a 3D printer for a number of years and I knew it was only a matter of time before my desire to build 3D models overpowered my resistance to shell out the cash. Apparently, $259.99 was my magic number. While searching for deals this black Friday/cyber Monday weekend I was able to find a Monoprice 13860 Maker Select 3d Printer V2 for $259.99 (~$40 discount), about the same price as a PS4 slim. That's not bad at all! So I took the plunge. Project Cost to this point = $0 ($259.99 Total) Part 3: Materials List And so it begins. I bought the needed materials from daftmike's list: $2.62 - Double Rows 2x5 10Pin Female DIP Straight Pin Header Socket $36.00 - Raspberry Pi 3 rev B $5.17 - Dip Mounting Locking Tact Tactile Switch $9.18 - NFC RFID V3 Module Kits for Arduino $7.98 - 5x7cm Double-Side Prototype PCB Universal Printed Circuit Board $18.98 - JST-XHP 2 / 3 / 4 / 5 Pin housing and Male / Female Pin Head Connector Adapter Plug Set (I'll use these for other projects down the line too, I really only need a few for this project. This is not included in the project price below, but is in the running total). $12.99 - NFC Tags $8.70 - OSOYOO Pro Micro ATmega32U4 5V/16MHz Module Board with 2 row pin header for arduino (Arduino Pro Mini replacment) $6.89 - 10 Wire Ribbon Cable (for front dual usb ports) $9.99 - RGB LED Breakout module For arduino $13.00 - Touch Lid bin clip latch $6.03 - Double Layers Female USB Type A Right Angle 8-Pin DIP Jack Connector $5.97 - Super Glue $8.99 - 5v 25mm X 25mm X 10mm Small Brushless Cooling Fan $84.84 - Filament (Dark Grey, Light Grey, Black, and Tranparent). Each 1Kg Spool cost between $15-$25 and I will use for other projects besides this. When I print the parts for the MiniNES I'll update with the actual cost of the parts then. Project Cost to this point = $121.51 ($491.29 Total) Part 4: Printing, Failing, Tinkering, Printing, Failing, You-tubing, googling, tinkering, printing, Making progress, Moding, Buying, waiting... Once I received the 3D printer and filament I bought, I tried a print. Like anything new, there is a learning curve. The ABS layers delaminated from one another and I got a crack down the part. More than this I tried to print with a Brim, which helps with bed adhesion, but it creates a lot of cleanup after the part prints since you have to cut it off. I can't use these for the case as it just looks bad. I could glue it but that's not ideal, and if one part delaminated then the whole thing will be brittle. The first NES print colors were way off too. See Below for Pics. So I went to the hardware store to pick up some spray paint and other parts required for my mods. Once I have a good print, I'll sand the finish and spray paint to the color I want (Best match a color blind person can manage, we'll see how that goes...lol). Ensuing was a week long learning curve with Cura (my slicer program) and its related settings for good prints in ABS, which was not as easy as I though it would be. A number of things about the stock operation of the printer bothered me too. I printed some mods. Y-Axis cable chain to prevent bed cables from catching on a piece of metal at the back, Z-Braces to help stabilize the frame and hopefully reduce z wobble (produces wavy ripples on the surface of a print), O-ring padded adjustable feet to help with leveling and to reduce vibration (which may affect print quality), X-Axis leveling rods to easily keep X and Y axis level to each other (Critical to an even bottom layer which affects both print quality and bed adhesion), a fan shroud that will more evenly and effectively cool the current layer of filament which will improve quality, and some clips to hold wrenches and the scraper (Just to have a handy place to keep them) While annoying, this is a necessary opportunity to dial in the settings and familiarize myself with the printer before printing the mini NES. While the mods are not technically necessary, they are somthing I will eventually end up doing anyway. So, I may as well do them now and get a better mini NES print when the time comes. I am still in the process of gathering materials and installing the mods. Next up is a new all metal Hot end, which is supposed to be a big improvement over the stock, giving more precise heat distribution in the extruder for better quality prints, and achieve higher temp for filaments that require it. Also, a Borosilacate Glass bed to give a perfectly flat build surface for an even bottom layer, which improves bed adhesion, surface finish, cleaning and part removal. I'm currently in a holding pattern until the Glass bed and Hotend arrive. I already peeled off the bed pad that came installed on the printer. That was a PITA!!! The glue used was incredibly difficult to remove. After peeling the pad off, which required an uncomfortable amount of force and strategic planning so as not to bend or break anything, something like 90% the glue residue remained. It took a razor blade, 2-4 floz of Goof off (Mainly Acetone), and about an hour of elbow grease to remove it all. There is no way I'm putting the second sheet that came with it on! I thought about printing directly on the aluminum but there's a drill hole dead center in the bed. I could get some painters tape to print on but I'm procrastinating another trip to the store. Until either the Glass bed arrives or I get some blue painters tape I can't print anything. I still need to print the Z-Brace brackets, I have the Gcode ready to go (it's a 24 hour print with my settings). I ordered the Glass bed and Hotend last night, so it will probably be another week until I try to print the case again. Extra Stuff Bought: $37.75 - Hotend Upgrade $5.98 - Flush cut wire clippers $19.01 - Z-Brace Parts (O-rings, nuts, 3ft threaded rod, machine screws) $41.96 - Caliper and Level (good to have) $7.76 - Spray Paint (Charcoal Grey for lower shell and Canvas white for top, This is the only thing in this section that will contribute to the Project Cost) $10.83 - Thermal pad $11.99 - Glass Bed $8.40 - Blower Fan $43.95 - 8BITDO NES30 Pro Controller (I just had to do it) Project Cost to this point = $129.27 ($678.92 Total) PICS:

 1 point
 -
Not related to this, is it?1 point
-
IN case anyone else is looking to do the same; The line you need to set to False is about 1/6th of the way down in the gameex.ini. Enablepopupdescriptions=True now= Enablepopupdescriptions=False Looks so much cleaner now with the (wrong) info gone. If anyone has a mameinfo.dat for 175, i'd be interested1 point